Creating event subscriptions
Event subscriptions enable your application to receive real-time notifications via webhooks when specific events occur. This section describes the three steps involved in creating a subscription through the graphical user interface.
Step 1: The webhook subscriptions application in Future Ordering Navigator
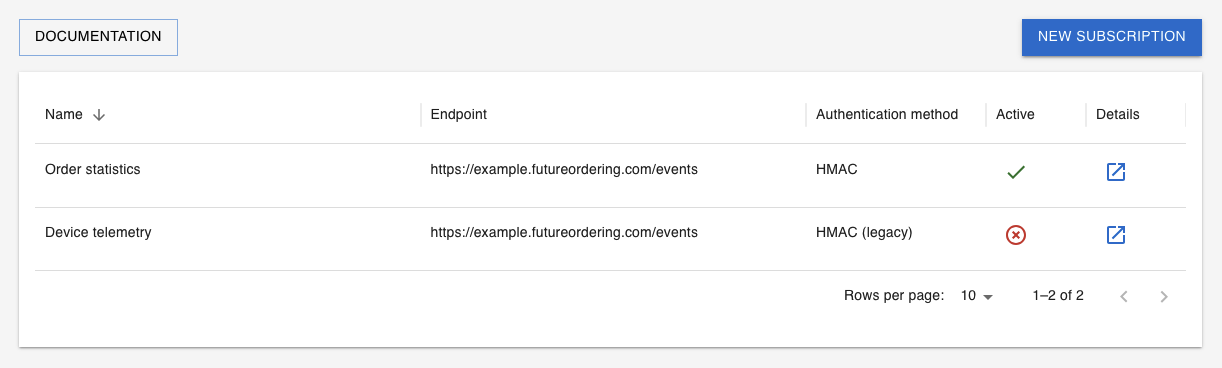
Open the Webhook Subscriptions application in Future Ordering Navigator.
The initial screen provides an overview of all existing event subscriptions. It displays key details such as subscription names and their current status. From this view, it is possible to manage existing subscriptions by editing or deleting them, as well as initiate the creation of a new subscription.
Step 2: Creating a new subscription
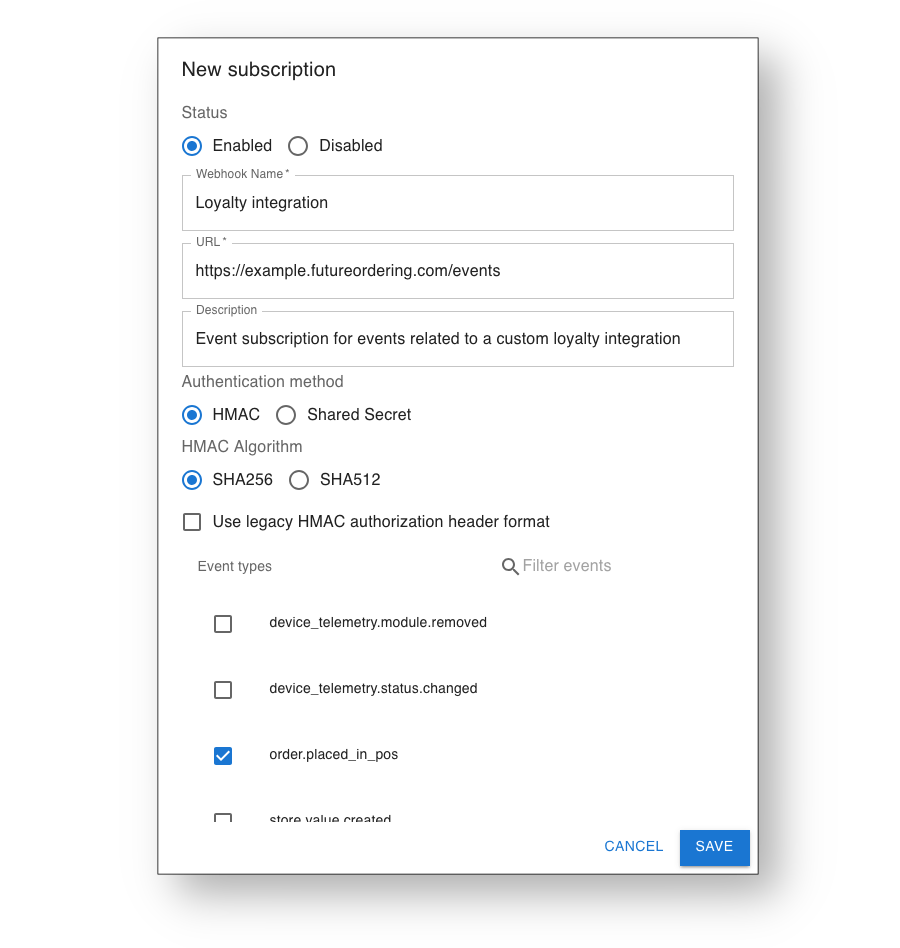
Clicking the button to create a new subscription opens a dialog that guides the configuration process. In this dialog, information about the event subscription is entered, such as the subscription name, the event types to subscribe to, and the endpoint to which the events should be sent.
Step 3: Store the shared secret key in a secure manner
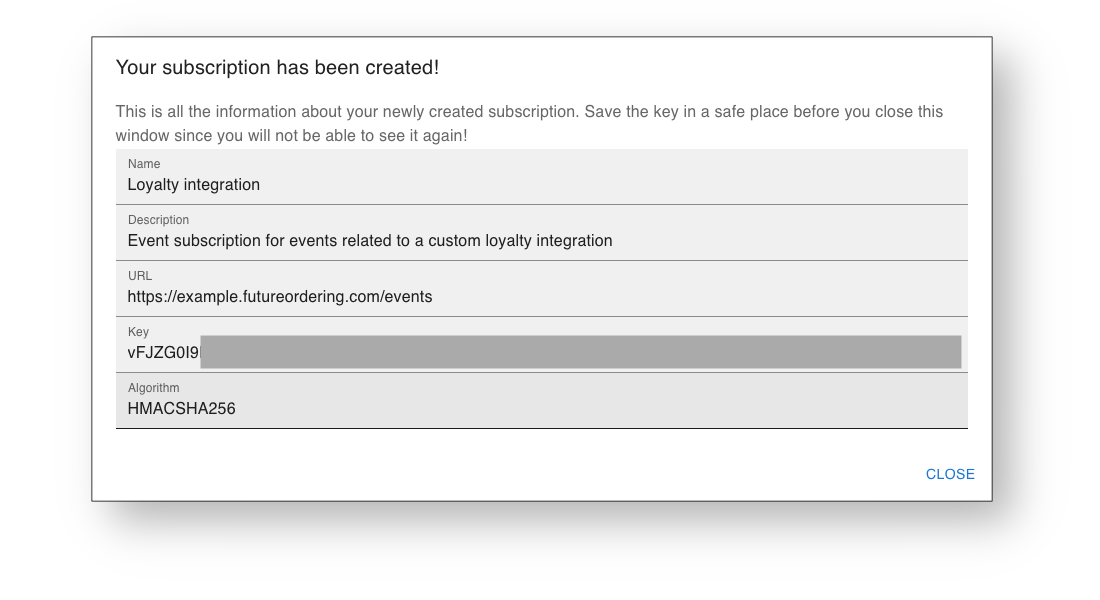
Upon successful creation of the subscription, a confirmation dialog is displayed. This dialog summarizes the subscription details, but most importantly, it provides the shared secret key that will be used to authenticate incoming events. This key should be treated as a sensitive password and must be stored securely, as it will not be displayed again. The shared secret is essential for validating the integrity and authenticity of the events your system receives.
Next Steps
After creating the subscription, implement signature validation using the shared secret key to ensure secure communication and follow best practices for building the integration. Test your webhook endpoint to confirm that it responds with a 200 OK status code upon receiving events.